Garage doors experience wear and tear over time, especially in high-use households or commercial properties. Dented or damaged panels not only affect how the door looks but can also disrupt its operation. Knowing when and how to replace a panel can save time, money, and more extensive repairs.
The decision to change a garage door panel may come after an accidental impact or exposure to harsh weather conditions. It is important to evaluate the extent of the damage before determining if a panel replacement is necessary. In many cases, replacing a single panel is a cost-effective solution compared to installing a new door.
If you’re researching how to change a garage door panel, it’s essential to follow accurate and safe procedures. This guide outlines steps, offers safety tips, and explains when to consider professional help. It’s tailored for homeowners and facility managers looking for reliable information.
When to Replace a Garage Door Panel
Minor dents or scratches can often be repaired. However, if a panel has structural damage, is significantly bent, or has rust or rot, replacement may be the better option. Misaligned panels can strain the entire garage door system, leading to more expensive problems.
Panel replacement is particularly common after vehicle impacts or storms. Visual inspection and alignment tests can help determine if the panel is compromising door function. If you’re unsure, a professional evaluation is recommended.
Safety Tips Before Starting the Replacement
Replacing a garage door panel can be a challenging and potentially hazardous task, especially if you’re dealing with a heavy, spring-loaded system. Prioritizing safety not only protects you from injury but also helps prevent damage to your garage door components. Before beginning any panel replacement, take the following safety precautions seriously.
1. Disconnect the Power
Before you begin working, unplug the garage door opener from the electrical outlet or shut off the circuit breaker that supplies power to it. This step ensures that the opener won’t accidentally engage while you’re working on the door, which could lead to severe injury or damage to the system.
Tip: Even if you’re not working directly on the opener, disconnecting power eliminates any risk of accidental activation via remote controls or wall switches.
2. Wear Proper Safety Gear
Garage door panels and their components can be heavy and sharp. Always wear:
- Heavy-duty work gloves protect your hands from cuts, pinching, and sharp edges.
- Safety goggles or glasses to shield your eyes from dust, rust, and metal shards.
- Closed-toe shoes or boots with non-slip soles to prevent injuries from dropped tools or parts.
For added protection, consider wearing a long-sleeved shirt and durable work pants.
3. Secure the Garage Door in Place
Garage doors are under significant tension and can shift unexpectedly if not properly secured. Before removing or adjusting any parts:
- Use locking pliers or C-clamps on the track just above one of the rollers to prevent the door from sliding down.
- Make sure the door is fully closed before starting. This reduces the tension on the springs and minimizes movement risk.
4. Have a Second Person Available
Panel replacements often require lifting or supporting parts of the door while removing brackets or hardware. It’s much safer and easier with help.
- Ask someone to hold the panel in place while you unscrew the mounting brackets.
- If something goes wrong, a second person can provide immediate assistance or call for help.
Never attempt heavy lifting or awkward maneuvers alone—it greatly increases the risk of accidents.
5. Understand Spring Tension Risks
The torsion and extension springs in garage door systems store a significant amount of energy. Mishandling them can result in severe injury or death.
- Do not attempt to adjust, remove, or replace torsion springs unless you are trained to do so.
- If the panel is damaged due to a spring issue (e.g., broken or unbalanced spring), contact a professional technician immediately.
Warning: Torsion springs are not a DIY component. They require special tools and expert knowledge for safe handling.
6. Inspect Your Tools and Workspace
Before beginning the job, gather and inspect your tools. Make sure they are in good condition and appropriate for the task. Your workspace should be:
- Clean and well-lit, with no obstructions around the garage door.
- Free from children and pets to avoid distractions or accidents.
7. Review the Door’s Manual or the Manufacturer’s Instructions
If available, consult your garage door system’s manual or the manufacturer’s online documentation. Specific models may have unique steps or warnings that apply to panel replacements.
Tools Needed to Change a Garage Door Panel
Having the right tools can make the job safer and more efficient:
- Socket wrench set
- Power drill
- Safety gloves and glasses
- Ladder
- Locking pliers
- Replacement panel matching your door’s model
Before purchasing a new panel, verify the model and manufacturer details for compatibility.
Step-by-Step: How to Change a Garage Door Panel Safely
Replacing a garage door panel requires careful handling to avoid damaging other components or putting yourself at risk. Follow these steps methodically to remove a damaged panel and install a new one.
1. Prepare Your Work Area
Before beginning the panel replacement:
- Clear the area around the garage door.
- Gather all required tools: socket wrench, screwdrivers, locking pliers, step ladder, gloves, and safety goggles.
- Ensure a second person is available to assist with lifting or stabilizing the panel.
2. Remove the Damaged Panel
Disconnect the Garage Door Opener
Unplug the automatic opener or shut off the power at the circuit breaker. This prevents any accidental activation while you’re working.
Manually Lift and Secure the Garage Door
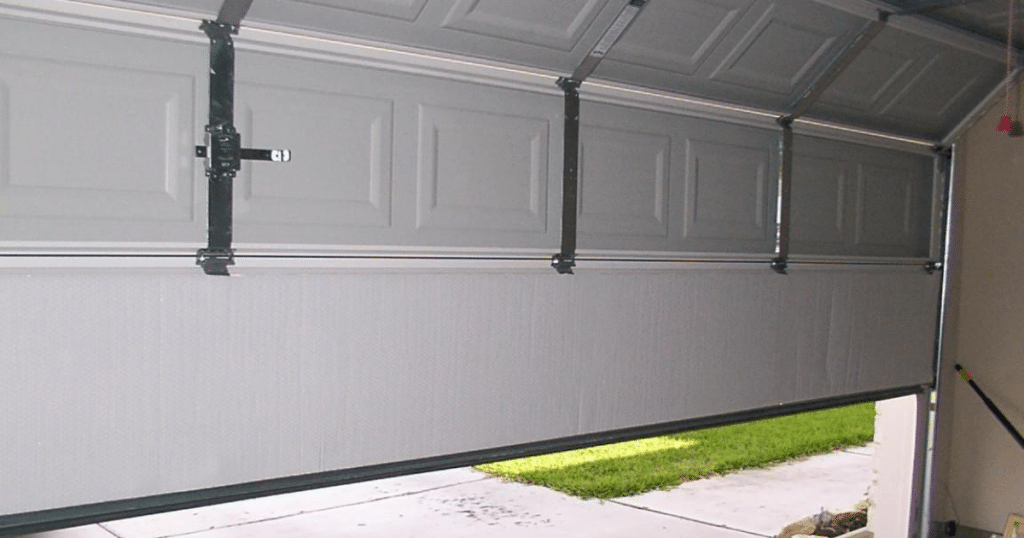
Raise the garage door slowly until the panel you want to remove is at chest level. Then, use locking pliers or C-clamps on the track just above one of the rollers to keep the door in place.
Tip: If you’re replacing the bottom panel, it may be easier to work with the door closed and use support blocks underneath the panel.
Remove Hinge Bolts and Rollers
Using a socket wrench or screwdriver:
- Remove the bolts that connect the hinges to the panel above.
- Detach the rollers from the side track carefully.
Keep all hardware in a labeled container to avoid losing or mixing parts.
Slide Out the Damaged Panel
With hinges and rollers removed, gently tilt and slide the panel out of place. If it’s a lower or middle panel, you may need to remove panels above it first to access it fully.
Caution: Garage door panels can be heavy. Always lift with your legs, not your back, and ask for help if needed.
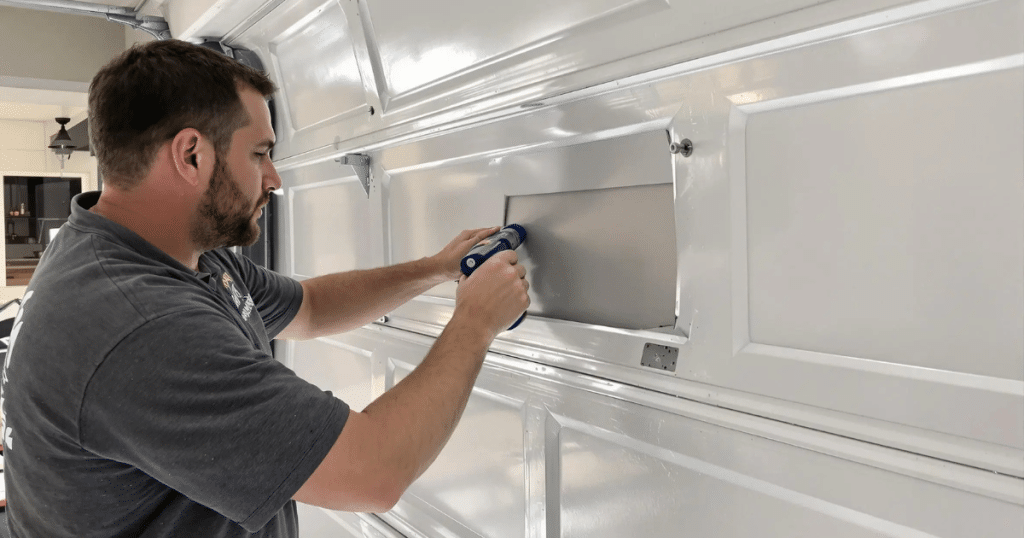
3. Install the New Panel
Slide the New Panel Into Position
With the space cleared, guide the new panel into the frame. Align it carefully with the edges and ensure the side grooves sit snugly in the track.
Reconnect the Hinges and Rollers
- Reattach the hinges using the bolts you removed earlier.
- Secure the rollers into their respective brackets and align them with the vertical track.
Tighten all bolts firmly, but avoid over-tightening, which can warp the panel.
Check Panel Alignment
Ensure that the panel lines up evenly with those above and below. Use a level to confirm it is straight and not bowed or tilted.
Lower the Door and Reconnect the Power
Once everything is installed and aligned:
- Remove the locking pliers or clamps from the track.
- Carefully lower the door to the ground.
- Plug the opener back in or turn the circuit breaker back on.
4. Test Door Movement
Activate the garage door opener (or manually operate the door) to observe its movement:
- Listen for unusual noises or grinding.
- Watch to see if the door opens and closes smoothly.
- Look for any visible gaps between the new panel and the surrounding ones.
If there are signs of misalignment, re-check the hinge and roller positioning or consider calling a technician for fine-tuning.
Final Tip:
Replacing a single panel should not affect the door’s overall structural integrity if done properly. However, if multiple panels are damaged or the frame has shifted, a full door replacement may be more cost-effective and safer in the long term.
Common Mistakes to Avoid When Changing Panels
- Skipping safety steps like securing the door
- Mismatching the replacement panel with the existing one
- Not testing for proper alignment
- Overtightening or undertightening hinge bolts
- Ignoring possible spring issues
Avoiding these mistakes can prevent further damage and ensure smoother operation.
When to Call a Professional Garage Door Technician
Even if you know how to change a garage door panel, not every situation is a DIY task. If the door has spring damage, track misalignment, or multiple panel issues, professional repair is the safer option.
A qualified technician can inspect the entire door system, identify hidden problems, and ensure safe installation. This is especially important for commercial garage doors or multi-panel replacements.
Frequently Asked Questions
How to fix a dented garage door panel without replacing it?
For minor dents, use a plunger or heat and cold methods (like a hairdryer and compressed air) to pop the dent out. Larger dents may require filling with auto body filler and repainting. Severe damage might need professional repair even if replacement isn’t necessary.
Can I replace just one panel of my garage door?
Yes, if the damage is isolated and the rest of the door is in good condition. Make sure the replacement panel matches the current door in style and fit.
How do I find the right replacement panel?
Check the manufacturer’s label, model number, and panel size. Contacting the original supplier or a garage door specialist can help you find the correct match.
How long does it take to change a garage door panel?
For someone experienced, it may take 1 to 2 hours. Beginners should allow extra time for safe handling and adjustments.
Conclusion
Understanding how to change a garage door panel helps homeowners make informed decisions about maintenance and repair. It’s important to know what tools are needed, the steps to follow, and safety protocols to observe. Mistakes can lead to further damage or injury, so it’s not something to take lightly.
For those with DIY experience, replacing a panel may be manageable. However, if the task involves spring tension or alignment issues, professional help is strongly advised.
End NOTE
BSD Garage Doors is your trusted local provider for garage door repair services in Naperville and the surrounding areas. We deliver prompt, reliable solutions tailored to your specific needs, with a focus on quality workmanship and customer satisfaction.
Our extensive service areas and competitive pricing make us a top choice for homeowners seeking both value and professionalism. Want to see what we’ve been working on? Explore our latest projects and reviews on our Facebook page, Twitter, and LinkedIn.
Ready to book a service? Use our online booking system for fast, convenient scheduling. Your garage door is an important part of your home—trust BSD Garage Doors to keep it operating safely and smoothly.
BSD Garage Door, LLC
955 West 75th Street, Naperville, IL, 60565, United States
+16305181962
